Connect a Spring Data YugabyteDB application
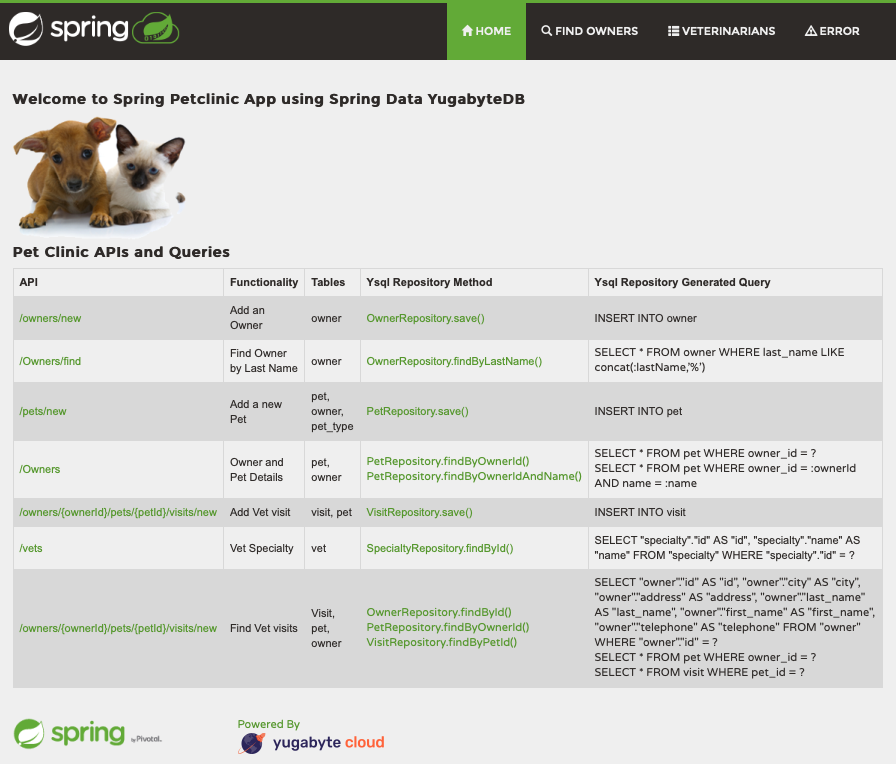
The example on this page shows how you can connect a Spring application to Yugabyte Cloud, using a version of the Spring PetClinic sample application that has been updated with a domain and persistence layer built with Spring Data YugabyteDB.
In addition to using Spring Data YugabyteDB, the application uses the following:
- Flyway to manage the database schema and initial data loading.
- SpringFox to deliver Swagger/OpenAPI docs.
The repository for the application is at https://github.com/yugabyte/petclinic-spring-data-yugabytedb. Instructions for connecting this application to YugabyteDB are also provided in the readme.md file in this repository.
In this walkthrough, you will:
- Download the Spring PetClinic application
- Obtain your cluster connection string
- Update and run the application locally
Prerequisites
- Git
- Yugabyte Cloud cluster
- Your computer IP address must be in an IP allow list
Clone the Spring Data YugabyteDB PetClinic application
-
On your computer, clone the Spring PetClinic sample application built with Spring Data YugabyteDB:
$ git clone https://github.com/yugabyte/petclinic-spring-data-yugabytedb.gitCloning into 'petclinic-spring-data-yugabytedb'... remote: Enumerating objects: 177, done. remote: Counting objects: 100% (177/177), done. remote: Compressing objects: 100% (121/121), done. remote: Total 177 (delta 43), reused 171 (delta 37), pack-reused 0 Receiving objects: 100% (177/177), 1.02 MiB | 1.28 MiB/s, done. Resolving deltas: 100% (43/43), done. -
Go to the
petclinic-spring-data-yugabytedbdirectory.$ cd petclinic-spring-data-yugabytedb
Install the certificate and copy the connection string
-
Sign in to Yugabyte Cloud, select your cluster, and click Connect.
-
Click Connect to your Application.
-
Click Download CA Cert to download the cluster
root.crtcertificate to your computer, and move the file to the~/.postgresqldirectory.$ mv ~/Downloads/root.crt ~/.postgresql/root.crt -
Under Add this connection string into your application, copy the YSQL connection string.
The connection string is in the form
postgresql://<DB USER>:<DB PASSWORD>@[host]:[port]/[database]?ssl=true&sslmode=verify-full&sslrootcert=<ROOT_CERT_PATH> -
Edit the connection string to retain only the host, port (5433), database (by default,
yugabyte), ssl, and sslmode entries. For example:postgresql://[host]:5433/yugabyte?ssl=true&sslmode=verify-full
Connect and run the application
-
On your computer, update the contents of the
spring-petclinic/src/main/resources/application.ymlfile by updating theyugabyte:datasource:urlwith the modified YSQL connection string, and username and password with your YugabyteDB database credentials.The connection string replaces the url after
jdbc:, as follows:yugabyte: datasource: url: jdbc:[modified YSQL connection string] load-balance: true username: [user] password: [password]where
[modified YSQL connection string]is the modified YSQL connection string, and[user]and[password]are the credentials for the database. -
Run the PetClinic application using the following command:
$ ./mvnw spring-boot:run[INFO] Scanning for projects... [INFO] [INFO] ----< org.springframework.samples:petclinic-spring-data-yugabytedb >---- [INFO] Building petclinic 2.1.0.BUILD-SNAPSHOT [INFO] --------------------------------[ jar ]--------------------------------- [INFO] [INFO] >>> spring-boot-maven-plugin:2.5.4:run (default-cli) > test-compile @ petclinic-spring-data-yugabytedb >>>Flyway configures the Yugabyte database with the Petclinic schema and loads the sample data.
-
Go to http://localhost:8080.
The PetClinic application is now running locally and is connected to your Yugabyte Cloud cluster.

Explore PetClinic
-
In the Petclinic app, click Find Owners, then click Add Owner.
-
Enter owner details and click Add Owner to add the new owner.
-
In Yugabyte Cloud, select your cluster, click Connect and choose Launch Cloud Shell.
-
Click Confirm to open the shell in a new browser window. The shell can take up to 30 seconds to appear.
-
Enter your password.
-
At the shell prompt, display the schema of the
ownertable.yugabyte=# \d ownerTable "public.owner" Column | Type | Collation | Nullable | Default ------------+------------------------+-----------+----------+---------------------------------- id | integer | | not null | generated by default as identity first_name | character varying(30) | | | last_name | character varying(30) | | | address | character varying(255) | | | city | character varying(80) | | | telephone | character varying(20) | | | Indexes: "owner_pkey" PRIMARY KEY, lsm (id HASH) "owner_last_name" lsm (lower(last_name::text) HASH) Referenced by: TABLE "pet" CONSTRAINT "fk_pet_owners" FOREIGN KEY (owner_id) REFERENCES owner(id) -
Run a query to select the id, first_name, and last_name columns.
yugabyte=# SELECT id, first_name, last_name FROM owner;
 id | first_name | last_name
----+------------+-----------
  5 | Peter      | McTavish
  1 | George     | Franklin
 11 | Mary       | Stewart
  6 | Jean       | Coleman
  7 | Jeff       | Black
  9 | David      | Schroeder
 10 | Carlos     | Estaban
  4 | Harold     | Davis
  2 | Betty      | Davis
  8 | Maria      | Escobito
  3 | Eduardo    | Rodriquez
(11 rows)